Twisted_Pony_ImgHeaderBanner@3x.jpg
GET THE LOOK

TWISTED PONY

For the girl on the go, get your updo hairstyle nailed with the help of ghd. Step out of the norm when it comes to wearing your hair up though – traditional ponytails are a thing of the past. Rock a hair updo befitting of modern day living with the twisted pony. Take this tousled, textured updo hairstyle and make it your new hair up look.

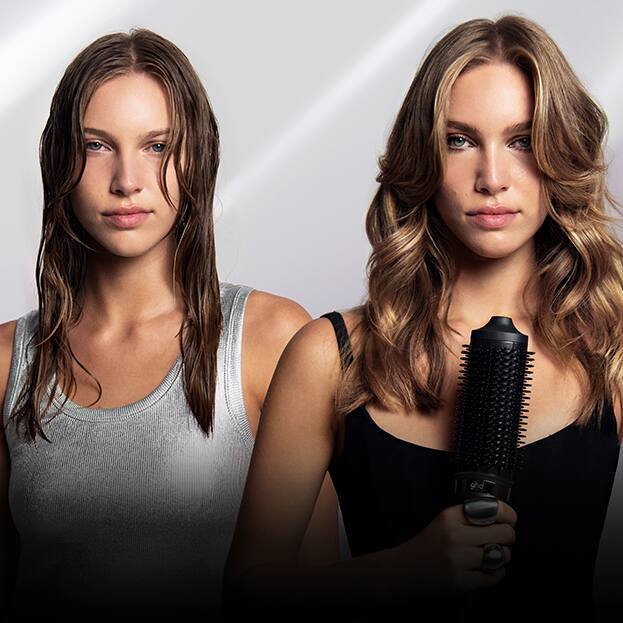
Give your locks the right prep and protection before styling your updo hairstyle, with ghd heat protect spray. The perfect tool to craft subtle waves in your ponytail and achieve movement in one stroke is with the ghd curve® creative curl wand. Add teased texture to your twisted tresses by working the ghd narrow dressing brush through your roots – this will create volume once you’ve got your hair up.

Take your updo hairstyle to the next level with the twisted pony. Effortlessly easy, find a new way to wear your hair up with our how-to guide.

Twisted_Pony_FiftyFifty@3x.jpg

HERE’S HOW TO CREATE A TWISTED PONY

1. Prep hair with heat protect spray

2. Section hair

3. Place curling wand above hair and twist wrap

4. Release and cool hair

5. Place wand below hair and twist wrap

6. Repeat steps 3, 4 and 5

7. Curl front sections

8. Tease roots

9. Section hair into 3, clipping 2 away

10. Tease middle section at roots

11. Twist loose section into roll and secure grip through twist

12. Undo left section and twist back to middle section

13. Secure with grip

14. Twist right section back and secure with other sections

15. Secure with grip

16. Loosen hair around face

STEP BY STEPS

Twisted_Pony_Step_1@3x.jpgSTEP ONE

PREP HAIR WITH HEAT PROTECTANT

Prepare the hair with ghd heat protect spray – this will give your hair protection against the heat of styling.
Twisted_Pony_Step_2@3x.jpgSTEP TWO

SECTION HAIR

Section the hair from ear to ear and clip the top away.
Twisted_Pony_Step_3@3x.jpgSTEP THREE

PLACE WAND ABOVE HAIR AND TWIST WRAP

Using the ghd curve® creative curl wand, place the wand above a section of hair and twist wrap around the barrel for 5-8 seconds.
Twisted_Pony_Step_4@3x.jpgSTEP FOUR

RELEASE AND COOL HAIR

Release the curl into your hand and cup until cool.
Twisted_Pony_Step_5@3x.jpgSTEP FIVE

PLACE WAND BELOW HAIR AND TWIST WRAP

On the next section place the wand below the section and twist wrap for 5-8 seconds.

TIP: Alternating above and below the hair will give you a textured finish.

Twisted_Pony_Step_6@3x.jpgSTEP SIX

REPEAT STEPS 3, 4 AND 5

Throughout the hair, always alternating above and below when wrapping.
Twisted_Pony_Step_7@3x.jpgSTEP SEVEN

CURL FRONT SECTIONS

On the front pieces either side of the face, place the wand above the hair pointing away from face and wrap the hair away from the face.
Twisted_Pony_Step_8@3x.jpgSTEP EIGHT

TEASE ROOTS

Tease the roots for added volume from the top to the bottom using a ghd narrow dressing brush.
Twisted_Pony_Step_9@3x.jpgSTEP NINE

SECTION HAIR INTO 3, CLIPPING 2 AWAY

Section the whole head in three and clip the two sides away.
Twisted_Pony_Step_10@3x.jpgSTEP TEN

TWIST LOOSE SECTION INTO ROLL AND SECURE GRIP THROUGH TWIST

Twist the loose section into a roll and grip securely in place, pushing the grip back through the twist. Don’t worry about it being too neat.
Twisted_Pony_Step_11@3x.jpgSTEP ELEVEN

UNDO LEFT SECTION AND TWIST BACK TO MIDDLE SECTION

Unclip the left section of hair and twist backwards next to the middle section.
Twisted_Pony_Step_12@3x.jpgSTEP TWELVE

SECURE WITH GRIP

Secure the section in place with a grip, pushing up and back into the twist.
Twisted_Pony_Step_13@3x.jpgSTEP THIRTEEN

TWIST RIGHT SECTION BACK AND SECURE WITH OTHER SECTIONS

With the last section of hair to the right-hand side, twist it back over the two sections already secured in place.
Twisted_Pony_Step_14@3x.jpgSTEP FOURTEEN

SECURE WITH GRIP

Secure the final section of hair in place with a grip, adding additional hair pins if needed.
Twisted_Pony_Step_15@3x.jpgSTEP FIFTEEN

LOOSEN HAIR AROUND FACE

To soften the look, gently loosen the hair around your face.