HOW TO FRENCH BRAID
Going to work, hitting the shops or dancing in the moonlight, the classic French braid looks simply stunning in every setting. Find out how to create this timeless look with our step-by-step guide.
step one: Brush your hair until smooth
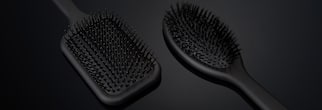
Work through your hair with a paddle brush to smooth your locks and get rid of any tangles.
Tip: For extra volume, spritz your roots with ghd root lift spray and blow-dry
step two: Take a three-inch-wide section from the centre of your hairline
Separate a three-inch-wide section of hair from your top hairline and hold in one hand.
step three: Divide equally into three strands
Split this section of hair into three equally sized strands, holding them between your fingers to keep them separate.
step four: Pass the right strand over the middle section
To create the first stitch in your French braid, move the right piece of hair across the middle section, so this takes the central position.
step five: Pass the left strand over the middle section
Repeat step four in the opposite direction, lifting the left piece of hair over the middle section so it sits in the centre of the three strands.
step six: Add extra hair into the right strand and repeat step four
Separate a half-inch wide piece of hair from the loose locks on the right-hand side of your head and add it to the existing right-hand section of the braid. Then repeat step four.
step seven: Repeat this technique on the left-hand side
Take a half-inch-wide piece of hair from the left-hand side of your head and add it to the existing left-hand section of the braid. Repeat step five.
step eight: Continue to the bottom hairline
Repeat the technique explained in steps six and seven to the bottom hairline, weaving additional pieces of hair into the braid until all your hair is incorporated.
step nine: Braid to the ends and secure with an elastic
Continue braiding your hair to the ends, using the standard three-strand braid technique, and secure with an elastic.
Tip: Loosen some strands of hair around your face to soften the look.
step ten: Mist your French braid with hairspray
Spritz your hair all over with ghd final fix hairspray for a sleek, glossy style that looks perfect all day.
Products used: paddle brush, ghd root lift spray, ghd final fix hairspray


